
I have recently written a guide on french website data-seo.fr, where I explain how to create a Public Cloud instance from scratch and to deploy open source Keyword Tracking tool Serposcope.
If you have followed it, you are now able to monitor your website’s rankings on Google, on an unlimited way for less than $3.5/month, clap clap clap !
Here I will explain you an advanced use of Serposcope thanks to your Public Cloud instance.
As a keyword tracking power user, you have probably noticed that Serposcope can sometimes meet some issues :
- The more you add keywords, the more the tool can be slow
- You have captchas
- Your IP has been blacklisted
To help you improve this, I will show you how to add additional IP addresses to you Public Cloud instance.
Why adding new IP addresses?
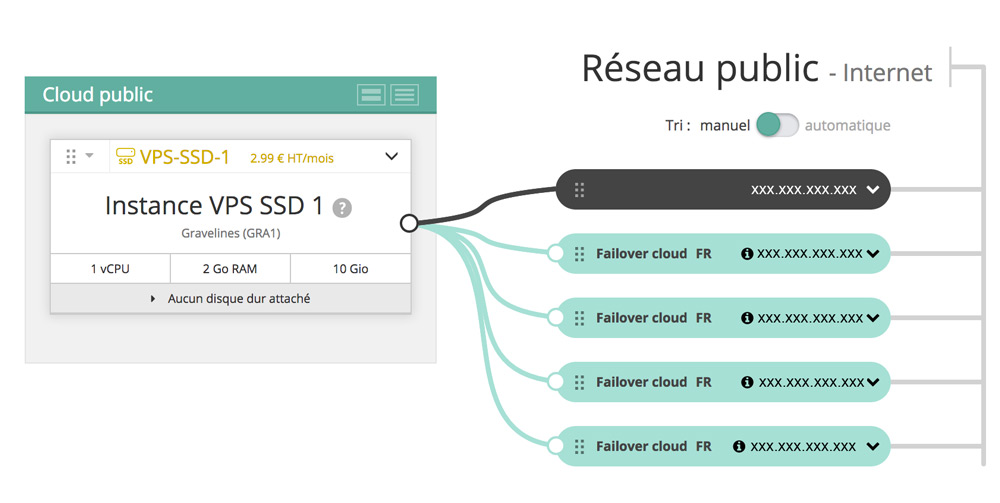
Each time you ask Serposcope to analyse your website’s position on a specific keyword, Serposcope has to request Google’s results pages. The more you track keywords, the more Serposcope requests with your instance’s IP address. This will sooner or later take you to limits I told you above.
The tip here is to use several IP addresses, and make them to request Google one by one. The goal is to increase the pause between 2 requests of a same IP.
How many IP do I need?
There is not good answer but here are few ideas to help you to choose.
Lets consider you are monitoring 3000 keywords on Serposcope.
With only 1 IP address and a 30 seconds pause between 2 requests, you will have to wait 25 hours to read the analysis. This could be a pain because Serposcope make a new analysis each 24 hours…
With 16 IP addresses, it will be possible to reduce the pause to 2 seconds between each request and keep a 32 seconds period between 2 requests of a same IP address thanks to the rotation. With this, you will not be bother by captchas or IP blacklist. The analysis time move from 25 hours to 2 hours.
Tutorial
This tutorial has been prepared for Ubuntu machines. This is the distribution you have installed if you have followed my first tutorial. If you are using an other distribution, it could have some differences.
1. Add IP to your Public Cloud instance
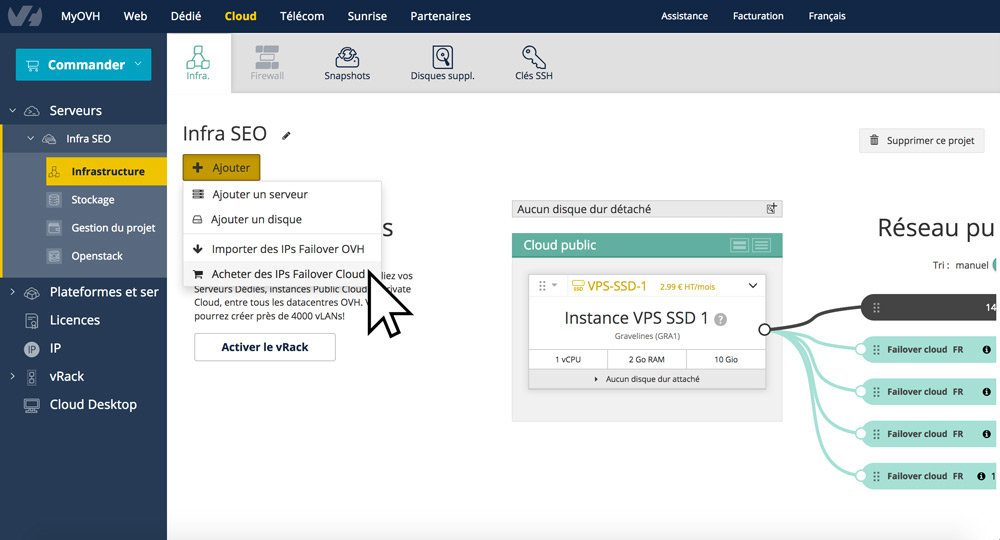
Lets connect to your OVH manager and go to your Instance (Cloud space).
Click on the yellow button + Add, then “Buy failover IPs”.
A failover IP address cost $3 for setup, with no monthly fees afterwards.
Select the number of IP you need and validate your purchase. Once you have paid, refresh the page : your new IP are now linked to your Public Cloud.
2. Modify the configuration file
You will now go inside your instance with SSH. For this, open a terminal and enter the following command:
ssh ubuntu@yourinstanceIP
Go root to be able to edit your config file:
sudo su -
Real things will happen now!
vi /etc/network/interfaces
You have open the file that allow you to configure the connection and IP addresses.
Add this lines to the end of your file.
auto ens3
iface ens3 inet dhcp

auto ens3:y
iface ens3:y inet static
address xxx.xxx.xxx.xxx
Replace “xxx.xxx.xxx.xxx” by your new IP address and “y” by 1.
You would like to add several IP addresses at a time? Copy / paste the 3 lines bloc by changing the value of the IP field and increment the alias number (y) like this:
auto ens3:1
iface ens3:1 inet static
address xxx.xxx.xxx.xxx
auto ens3:2
iface ens3:2 inet static
address xxx.xxx.xxx.xxx
Once you have uploaded your config file, save and leave it:
:w!
Restart your network services with the command:
service networking restart
You can now leave your instance and close the terminal.
3. Setup your IP on Serposcope
RDV on Serposcope, then in Admin > Proxy.
Click on “Add Proxy”
Add each new IP address with the bind#xxx.xxx.xxx.xxx command, then validate.
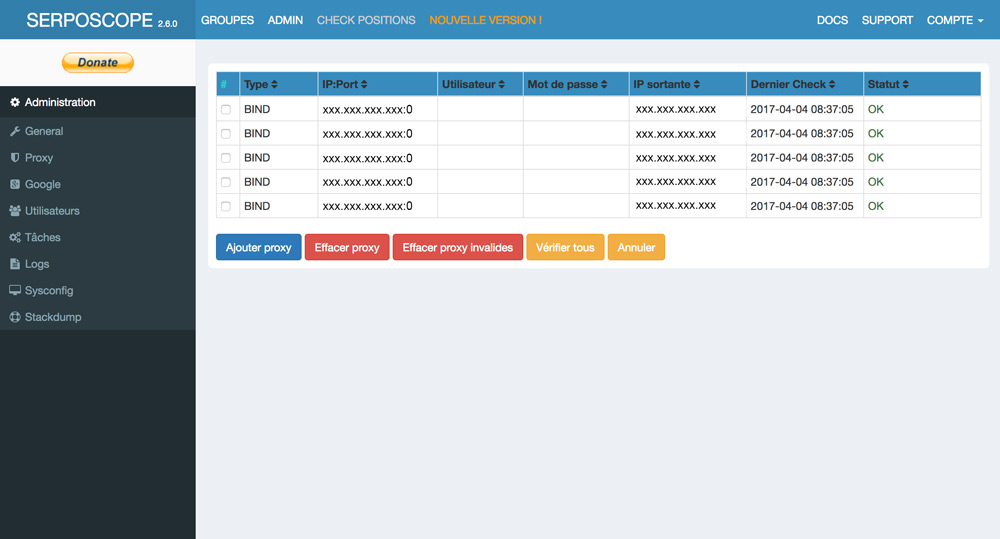
4. Check your configuraiton
Click on “Check everything”. The status of your IP addresses should be OK.
You can also check the use of your new IP addresses by reading Serposcope log files (ADMIN > Logs).
I hope you enjoyed this tutorial, now it’s your turn to share your Serposcope tips!
In my upcoming post, I will show you how to use Dataiku DSS, a Data Science tool to analyse your web logs
Hi Remi,
I don’t have a account on OVH and none fallover IP. Where can I get those Fallover IP
It sounds like you haven’t tomato but want to make a tomato sauce… I can’t help you here, sorry.